

How to Personalise Google Review Links With Programmatic Email Modules
One HubDB table and one programmatic module send every customer the review link for the site they actually visited. Built for multi-location operators with a Google Business Profile per branch.

If you run more than one location, a retail group, a franchise network, a clinic with four rooms in three suburbs, you have a Google Business Profile per site and a different review link for each one. Send everybody the same link and half your reviews land on the wrong branch. This puts the right link in the email automatically, based on where the customer was actually serviced.
Before You Get Started
Do all your locations point people to the right place?
The links usually live in one person's spreadsheet.
You will need a Marketing Enterprise or CMS Professional / Enterprise subscription in order to use the HubDB table. You will also need Marketing Hub Professional / Enterprise to use the programmatic email modules.
You also need to be tracking which location your customer is serviced at within HubSpot. The best way to do this is to create a Location Code property in HubSpot, and make sure it is populated on the Contact object.
Step by Step Instructions
1. Create a HubDB Table
HubDB tables are basically like an Excel Sheet, except cooler. If this is your first time creating a HubDB table check out this article first, before moving on.
Now, each table has multiple ID's you need to be aware of:
- Table ID: This is the numerical ID of the table itself.
- Column ID: Each column within the table has a corresponding alphanumerical ID.
- Row ID: Each row within the table has a corresponding alphanumerical ID.
These ID's can be used in code to tell HubSpot what it needs to do.
For this specific use case we want to create a table with the following columns: Location, Location Code and Google Review Link. I would recommend creating this in a Spreadsheet first and then importing it into HubSpot, especially if you have a bunch of locations.
After that, your table should look a little something like this:
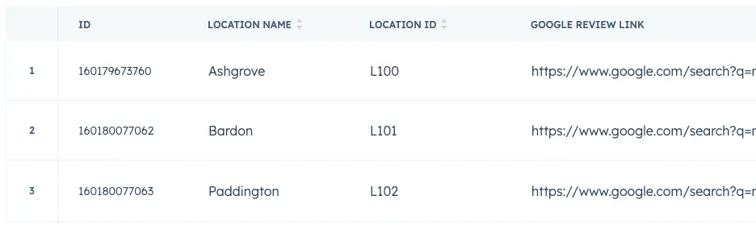
Important Note: The location code or location name must match your contact's location property exactly. For example if you contact’s location is “Ashgrove” on their contact record, but HubDB says “Ashgroove”, it will not work.
2. Create a Programmatic Email Module
I have some good news for you non-coders out there. I have written the code you need, so this part is copy and paste. There is a bit of replacing to do and I will take you through it. If you have never worked in a code module before, what custom code blocks let you do beyond the drag and drop editor is worth five minutes first.
(a) First, let's create a programmatic email module. Go to Marketing > Files and Templates > Design Tools.
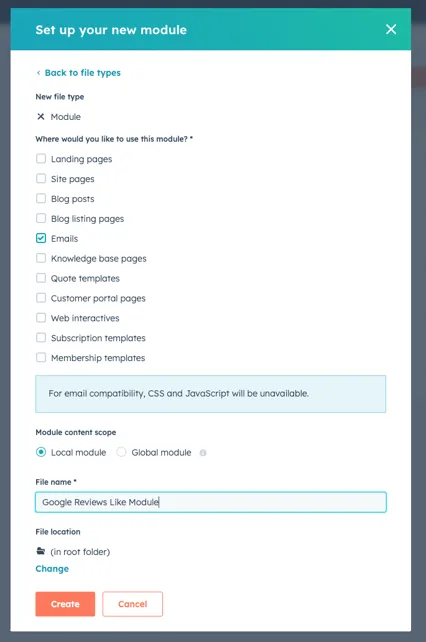
(b) Now, in the design tools screen, select Create a new file > Module > Next. Give your module a name, select "Emails" in the list of where you would like to use this module and place it in a folder.
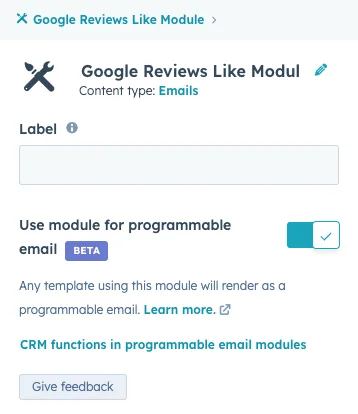
(c) We need to set this module to programmatic. On the right hand side you will see a toggle for the module to be used programmatic emails, toggle this on.
(d) Now, you are going to copy and paste the following code into the blank code document. But first we want to replace anything in red. The following guide is listing in order of the code.
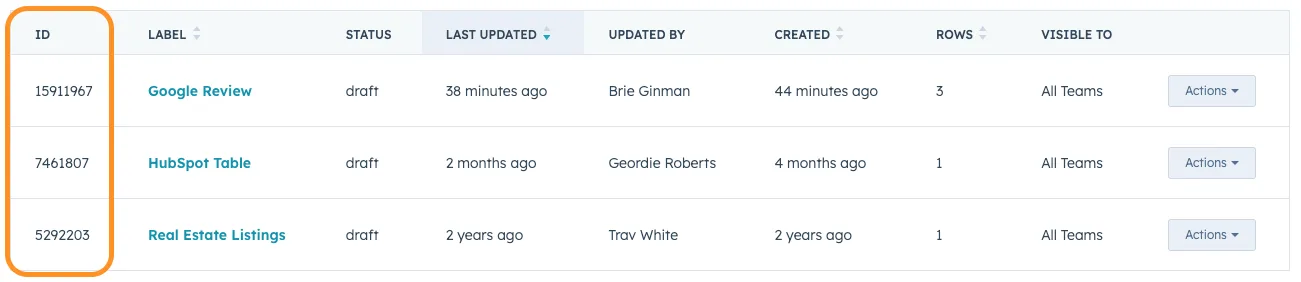
i) Replace 7586823 with the ID of your table. You can find this on the HubDB listing page.
ii) Replace the first location_code with the ID of the column listed your location code. This is the column that needs to match the Location Code Property. You can find this ID within the HubDB table by selected the arrow next to the column name.
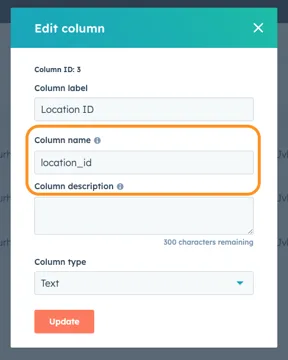
iii) Replace the second location_code with the ID of the Location Code property. You can find this in the property settings.
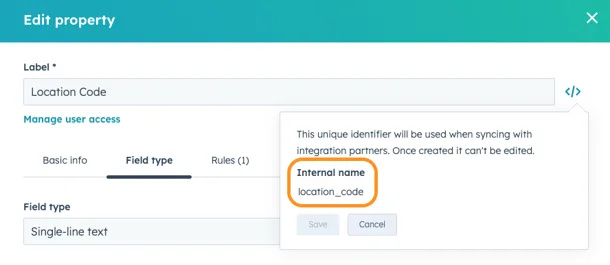
iv) Replace both google_review_url with the ID of the column listing your Google Review URLs. You can find this ID within the HubDB table by selected the arrow next to the column name.
|
{% if contact.location_code %} |
3. Publish and Use
That is it, click Publish.
Now when building you email, simply drag and drop the module into your email. You can test it is working by going into preview and selecting a random contact to confirm it is showing the correct Google Review Link.
Before you send it to the whole list
A review request is a commercial electronic message under the Spam Act 2003, so the ACMA rules cover the whole send: consent, either express or inferred from the customer relationship, the sender identified, and a working unsubscribe. The part people get caught by is that the burden of proof sits with the sender, so the consent needs to be recorded somewhere you can produce later rather than assumed because someone once bought something. Segment on that record before the send, not after the complaint.
Two more in the same shape, both worth building while the module is fresh in your head: adding dynamic meeting links to your own marketing emails, and using alternative meeting link URLs in automated email buttons. Building this sort of thing properly across a portal is our RevOps and HubSpot work.
Not sure HubDB is the right home for your locations?
Not sure HubDB is the right home for your locations?
Location data tends to be right in one system and stale in three.
Location data tends to be right in one system and stale in three.